OTP Verification with Vonage

Bibhuti Poudyal
May 30, 2021
7 minutes min read
OTP verification has become a common feature of modern web & mobile application. Either it be user registration, multi-factor authentication or password change mechanism, OTP verification seems to be perfect choice. Also SMS or phone call verifications are considered more secure & reliable than email links. In this article I will explain about Vonage’s Verification […]

OTP verification has become a common feature of modern web & mobile application. Either it be user registration, multi-factor authentication or password change mechanism, OTP verification seems to be perfect choice. Also SMS or phone call verifications are considered more secure & reliable than email links.

In this article I will explain about Vonage’s Verification API integrated with Nodejs(express) server. It also provides OTP feature, so you don’t have to reinvent the wheel every time. You can check more info here.

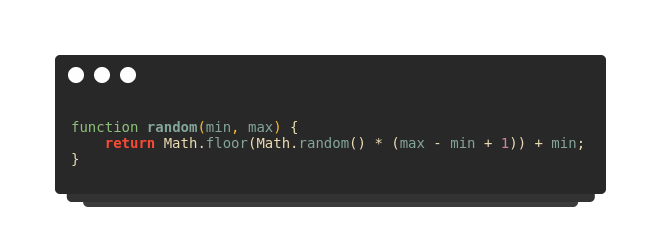
Lets begin with a very basic express server.

The server.js file contains a very basic web server with 2 routes.

  • /api/request-token
  • /api/verify-token

Business logic for each endpoint are inside vonage.service.js. The service file uses @vonage/server-sdk; official JS library for Vonage API. Vonage API Key and API Secret can be obtained on dashboard once subscribed for the service.

Service file has 3 methods: for requesting, verifying and cancelling token.

At first the vonage object is initialed with apiKey and secret obtained from Vonage. Then there are two pieces for this entire workflow: request code & verify. Lets dive into each of them.

Request OTP

The one job of this method is to send OTP token to the given phone number. Vonage verification service handles it in a cool way. As per the time of writing this article, it sends SMS to given number. If OTP isn’t verified within that time, it calls the number either on SIM card or in my case it called me on Viber. When you get the OTP code you can then send it to API for verification. Process seems straightforward but it can be tricky during implementation.

Some of the caveats I ran into:

– Can’t send concurrent OTP to a phone no within 30 seconds interval.

– Can’t cancel the OTP request multiple times. If done, it will throw error repeatedly.

Considering these points lets move forward with code. First of all lets complete the requestCode method in vonage.service.js file.

The method takes phone number and returns the most important thing request_id.

Normally you don’t have access to OTP code sent by Vonage. If you need please visit their pricing section.

If you get request_id on response, it was successful request, else there were some errors.

Another piece of this mechanism is the cancel token request. There may be cases which requires OTP request to be cancelled. One of the prominent reason would be: Vonage has 5 minute limit for OTP expiry. In real world, it’s a very long wait. Worst case: who waits for 5 min to receive a OTP 😂

So you may need to cancel the pending request and re-send another OTP. The code to cancel request looks something like this.

It’s a pretty straightforward code that requires the OTP’s request_id to cancel it. As you may have seen, request_id is the only way to track your OTP. So, store it safely.

These 2 methods would be sufficient to request an OTP. Now lets move onto server.js to implement these methods.

First of all check for the presence of phone number. Then remove all the present whitespaces . Sometimes phone number are in weird format(+12 345 678 890). It may cause issue for services like Vonage. It requires the country code though.

Basically, the code above requests for OTP via vonage.service.js. In case of success onOtpSuccess function is executed, in case of error onOtpError is executed. In case of concurrent OTP request to same number within 5 minutes, Vonage throws error with status 10. That case is handled by cancelling the OTP with its request_id and resending the request. If it fails again, its flagged as error.

Up to this point you have seen how to request OTP, how to cancel it (if required). Another piece of the puzzle is verifying the OTP.

Verify OTP

To recall: we have 2 files server.jsvonage.service.js and request_id is the only way to track your OTP.

The logic for verification is quite straightforward unlike OTP request mechanism. First lets look at vonage.service.js for its implementation.

Verification is done via

  • request_id which is store on DB or received from user
  • OTP code which user receives on phone via SMS or call.

Successful verification will return the result with status 0.

Moving onto server.js file, the verifyOtp method is used like this.

Here, both OTP and request_id is being retrieved from API request. It may depend on your implementation.

In this way, you can send OTP code to user’s device and verify it using Vonage’s verification API. You can find a basic implementation on Vonage’s JS guide too. This article serves a more detailed guideline to implement it on Express JS server.

BACK TO BLOG

Snake game in 110 Lines of Code

Bibhuti Poudyal
January 10, 2021
8 minutes min read
Build a Snake game in 110 Lines of Code using just Html and JS.

In this article, I will build a simple snake game in JavaScript from scratch. The player can control the snake by the keyboard. Whenever the snake collides with food(a red circle), it gets 1 point and food moves to a random position.

You can view the finished application here. And the source code is here.

Image for post
Demo

The requirements for this application are basic knowledge of HTML, JavaScript, and some prior knowledge of HTML canvas.

The file structure of the application looks something like this:

  1. index.html: contains the HTML code
  2. script.js: contains the main logic of the application
Image for post
index.html file

The canvas is given the height and width of 500px and border-style ‘solid’ so we can view it clearly. It is given the id ‘canvas’ to reference it from script.js file That’s all for HTML. Open it in your browser and you will see an empty white box. That’s our canvas.

Now let’s move on to the scripting part. Initially, we get reference to the canvas so that we can draw on it.

Image for post
Reference canvas in HTML from JavaScript

In order to use canvas, we get reference to the context of the canvas. The parameter ‘2d’ is passed, which specifies that we are working in 2D. Next, we declare some variables which will hold our snake, food, score, direction, speed etc. Information of each variable is in the comments.

Image for post
Basic JavaScript setup for the game

Now we have our variables ready, we initialize our snake. Initially, snake array is empty. It’s supposed to contain the coordinates of the snake. Let’s do that now.

Image for post
Re-render the screen every 100 milliseconds

The for loop goes from 0 to length. Each time it adds a circle to the snake array so that the circle lies exactly to the left of the previous circle. For that, the x-coordinate of the circle is decreased each time by (size*2) and the y-coordinate is kept constant. After the snake is made ready we call the setInterval function which takes two parameters: a function to call each interval and an integer number which is the interval in milliseconds. In our case, it’s 100. i.e the function draw is called once in every 100 milliseconds.

The draw function is the main part of our program where the magic happens. In every 100 milliseconds, the draw function is invoked which clears the canvas, updates the position of the snake based on its direction, and redraws it. This happens so quickly that we don’t even notice. At the same time, it checks the collision of snake and food and updates the score too.

Image for post
the draw function

ctx.clearRect() method clears the canvas before redrawing. The successive for-loop loops over the circles of the snake from its tail to head (from the last index to the first index). If the current index is not the head, it sets it to its preceding circle. i.e. the last circle takes the position of second last circle, second last takes the position of third last, and so on… so that the snake seems as if it’s moving.

If the current index is head, first it checks the direction(at switch case) and increases the coordinate of the circle according to that direction.

Right: increase x-coordinate

Left: decrease x-coordinate

Up: decrease y-coordinate

Down: increase y-coordinate

After adding and subtracting the coordinate it should be drawn on the canvas so that the player can see the moving snake. The code below draws each circle of the snake with its updated coordinates.

Image for post
draw snakes with arc

Now the snake is drawn on the canvas. But it’s not the only thing to draw, we still need to draw the food and score. Drawing the food is similar to drawing the circles of the snake. In case of food, we fill it with red color. The next issue is checking the collision. The function checkCollission() does the job and returns a Boolean value. It takes two circles as its parameter, in our case, it’s the snake’s head and the food.

Image for post
Check for collision

The logic for the above function is quite simple. It what we studied in our school. First, we take the distance between the central points of two circles and compare it with the sum of their radii. If it is greater: no collision; else: they collided. The illustration will clear the concept.

Image for post
check distance between centers of two circles to detect collision

If checkCollission() returns true, first the score is increased and the food is placed on any random position between 0 to width/height of the canvas. The random function takes two parameter min, max, and gives a random number between them.

Image for post
random function

Now we have come to the end. The last piece of the puzzle is the keydown event handler. We need to control the direction of the snake according to the keyboard button pressed.

Image for post
handle keyboard events

The onkeydown handler is invoked whenever a key is pressed down. Then we check if the key is rightleftup or down arrow and assign the respective direction. 373839 and 40 are the keyCode (ASCII value) for left, up, right and down arrows. Now save the file and open it in your browser.

The code doesn’t work yet. It’s because, for the code to work the timer should start, which we haven’t done yet. As you have noticed, the timer is set in init() function. So call the init function at the last line of your code, save it, and refresh the browser. You can see a moving snake that you can control with the keyboard’s arrow keys.

Happy Coding !